Creating photorealistic textures is essential for achieving high-quality 3D renders in Blender. Physically Based Rendering (PBR) materials allow 3D artists to simulate real-world surfaces with accuracy, enhancing the realism of their projects. In this guide, we’ll explore how to master PBR materials in Blender to create realistic textures for your renders. Furthermore, we’ll discuss optimization techniques to enhance performance.
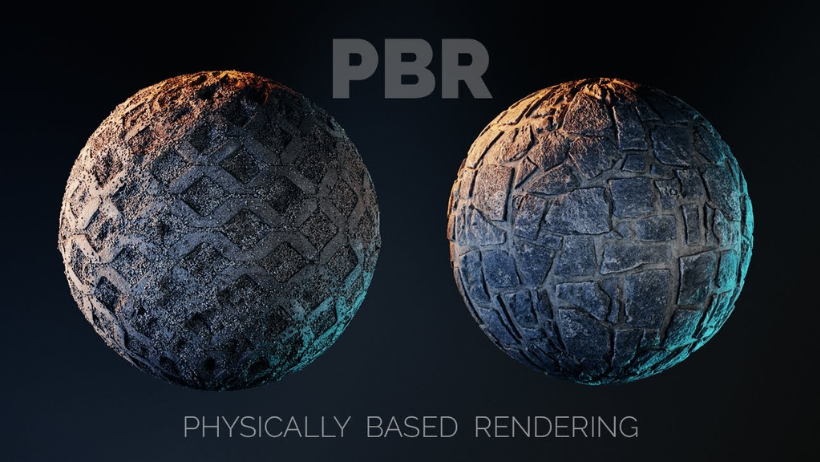
What Are PBR Materials?
PBR materials use scientifically accurate shading models to replicate how light interacts with surfaces. They consist of multiple texture maps that define various properties of a material, such as:
- Albedo (Base Color) – The color and pattern of the material.
- Roughness – Determines surface smoothness and light reflection.
- Metallic – Defines whether a material behaves like a metal or a non-metal.
- Normal Map – Adds surface detail without increasing geometry.
- Height (Displacement) Map – Creates realistic depth and elevation.
- Ambient Occlusion (AO) Map – Enhances shadowing in crevices.
By combining these maps, you can achieve lifelike PBR textures in Blender that react realistically to lighting conditions. Consequently, your renders will look much more convincing and visually appealing.
Setting Up PBR Materials in Blender
To start using PBR materials in Blender, follow these steps carefully:
1. Import or Create PBR Texture Maps
- First, download high-quality PBR textures from websites like Poliigon, AmbientCG, and Texture Haven.
- Additionally, you can create custom texture maps using software like Substance Painter or Photoshop. This approach gives you greater control over texture details and ensures better consistency.
2. Apply the Principled BSDF Shader
- Open Blender and switch to the Shader Editor.
- Next, create a new material and assign a Principled BSDF Shader to your object.
- Since this shader consolidates multiple material properties into a single node, it simplifies PBR material creation in Blender. As a result, the workflow becomes more efficient.
3. Connect Texture Maps to the Shader
- Base Color → Connect the albedo texture to the Base Color input.
- Roughness → Attach the roughness map to control reflectivity.
- Metallic → Link the metallic map for defining metal-like surfaces.
- Normal Map → Use a Normal Map node to enhance surface details.
- Displacement Map → Apply height maps for additional depth and realism.
- Ambient Occlusion → Integrate AO maps to improve shading accuracy.
4. Adjust Material Properties for Realism
- Modify the Roughness and Metallic sliders to fine-tune reflections.
- Furthermore, use the Subsurface Scattering (SSS) option for realistic skin or organic materials.
- Finally, enable Clearcoat for extra sheen on materials like car paint or plastic. These adjustments will significantly enhance the realism of your PBR materials.
Optimizing PBR Textures for Blender Renders
To ensure high-quality PBR materials in Blender, optimize your workflow with the following techniques:
a. Use High-Resolution Textures Wisely
- Higher-resolution textures improve detail but may impact performance.
- Therefore, use 4K or 8K textures only when necessary, and downscale for less critical objects. This method helps balance quality and efficiency, ensuring smoother rendering.
b. Enable GPU Rendering for Faster Previews
- Go to Preferences > System and enable CUDA or OptiX for NVIDIA GPUs.
- As a result, this boosts Blender rendering performance when working with PBR materials, ensuring a smoother workflow and faster feedback.
c. Bake Textures for Optimization
- Baking reduces the number of real-time calculations required for PBR materials in Blender.
- To achieve better performance, use Texture Baking to create simpler textures that maintain visual quality while improving speed. This step is particularly useful for game development and real-time applications.
>>> Read more: How to Create Looping Animations in Blender: A Step-by-Step Guide
Enhancing Realism with Lighting and Reflections
1. Use HDRI Lighting for Realistic Reflections
- HDRI (High Dynamic Range Imaging) environments provide realistic lighting and reflections.
- To implement this, add an HDRI in World Settings to enhance the appearance of PBR materials in Blender. Consequently, this method creates more immersive scenes.
2. Enable Screen Space Reflections
- Go to Render Properties > Screen Space Reflections and enable it.
- This feature enhances reflections on materials like metal, glass, and water, making them look more natural and visually appealing.
3. Fine-Tune Material Roughness and Bump Mapping
- Adjust the Roughness Map to achieve natural surface imperfections.
- Additionally, use Bump Mapping or Normal Maps to add subtle detail without increasing geometry. By doing so, you enhance texture depth efficiently without affecting performance.
Exporting PBR Materials for Other Platforms
Blender allows you to export PBR textures for game engines and other 3D applications. Follow these steps carefully:
- Pack Textures: Go to File > External Data > Pack All Into .blend to include textures in your project.
- Export to GLTF or FBX: These formats support PBR materials and are widely used in Unreal Engine, Unity, and Sketchfab.
- Verify Texture Compatibility: Finally, ensure your textures are properly mapped in external applications. This step prevents unexpected material issues and ensures consistency.
>>> Read more: Best Lighting Techniques for Stunning 3D Renders
Conclusion
Mastering PBR materials in Blender is crucial for creating realistic textures that elevate your 3D renders. By understanding PBR texture maps, utilizing the Principled BSDF Shader, and optimizing Blender rendering settings, you can achieve professional-quality results. Whether you’re working on game assets, architectural visualization, or VFX, mastering PBR materials in Blender will significantly improve your workflow and final output.
Start experimenting with PBR materials in Blender today, and bring your 3D projects to life with stunning realism! With practice, your renders will continuously improve.
For rendering your high-quality Blender projects, consider using 3S Cloud Render Farm. It offers fast and efficient cloud rendering, helping you save time while achieving top-tier visual quality. Moreover, cloud rendering ensures smooth performance, even for highly detailed projects.