Carton box mockups are essential in packaging design. They help clients see the final product before it goes into mass production. With the power of Blender, you can easily build and visualize these mockups in 3D. Whether you’re a product designer, 3D artist, or freelancer, using Blender for carton boxes will speed up your workflow and improve your results.
In this article, we’ll walk you through the full process—step by step—from modeling to rendering using Blender, and how 3S Cloud Render Farm can help accelerate your rendering time.
Why Use Blender for Carton Box Mockups?
Blender is a free, open-source 3D software. It offers powerful modeling, shading, lighting, and rendering tools. Many designers choose Blender because it’s flexible and user-friendly. Whether you’re new to 3D or an expert, Blender gives you full control over your design.
Key Steps to Create a Carton Box in Blender
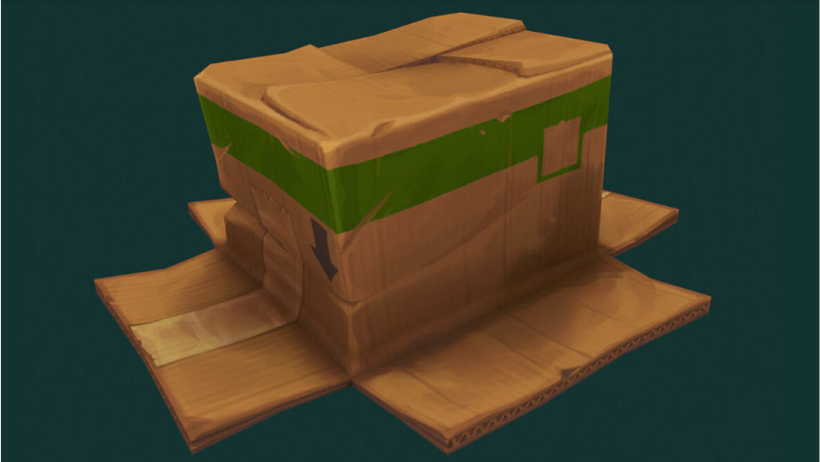
Step 1: Modeling the Carton Box in Blender
First, open Blender and delete the default cube. Then, create a new cube and scale it to the shape of a box. Use Edit Mode to adjust vertices and add loop cuts for more control.
To create the box flaps:
- Select the top face.
- Use the knife tool or add inset faces.
- Extrude the faces upward and rotate slightly to open the flaps.
Tip: Use the mirror modifier to keep both sides symmetrical. This saves time and ensures precision.
Blender’s modeling tools are flexible, so you can make any box style—pizza box, shipping box, or gift box.
>>> Read more: Blender’s Physics Simulations: Cloth, Fluid, and Smoke Effects
Step 2: UV Unwrapping and Applying Your Packaging Design
After modeling, switch to UV Editing mode. UV unwrapping helps you apply your 2D label designs onto your 3D model.
Here’s how to do it:
- Mark seams along box edges using Ctrl+E → Mark Seam.
- Unwrap the model using U → Unwrap.
- Create a new material in the Shader Editor.
- Add an Image Texture node and load your packaging design.
Make sure your design fits the UV layout. You can use Adobe Illustrator, Photoshop, or even Canva to design your carton artwork. Blender lets you preview the design directly on the box in the Material Preview mode.
Step 3: Lighting and Camera Setup in Blender
Lighting is key to realism. In Blender, you can use different types of lights:
- HDRI environments for realistic ambient lighting.
- Area lights to highlight the product edges.
- Point lights to create soft shadows.
Position your lights to bring out the texture and shape of the box. Also, use a three-point lighting setup for a clean, professional look.
Now, add a camera and adjust the focal length. Try different angles to find the one that shows the box best. You can use Blender’s Depth of Field feature to blur the background slightly and focus on the box.
>>> Read more: How to Reduce Noise in Blender’s Cycles Render Engine
Step 4: Rendering with 3S Cloud Render Farm
Rendering high-resolution carton mockups can be time-consuming, especially if you use Cycles in Blender. That’s where 3S Cloud Render Farm comes in.
Why render with 3S Cloud?
- Fast and stable rendering.
- Full support for Blender, including Cycles and Eevee engines.
- Upload .blend files directly and render in the cloud.
- Real-time progress monitoring and auto-download after render.
- Compatible with major Blender add-ons.
You don’t need a powerful computer. Just upload your file and let our GPU-powered system do the work.
Blender file tips:
Before uploading, make sure to:
- Pack all external files (File → External Data → Pack into .blend).
- Check resolution, samples, and render settings.
- Test your scene with low sample count locally.
Step 5: Final Touches and Exporting
Once the render is done, you’ll receive a high-resolution image. Open it in your favorite editing software to make small tweaks—adjust brightness, contrast, or add branding.
Now you can use the mockup for:
- Client presentations
- Product catalogs
- Online stores
- Portfolio showcases
Final Thoughts
Using Blender to create carton box mockups is efficient, flexible, and free. You have full control over design, lighting, and materials. Plus, with 3S Cloud Render Farm, you don’t have to wait hours for rendering. We make Blender projects faster, smoother, and more scalable.
Whether you’re designing packaging for cosmetics, electronics, or food, Blender helps bring your ideas to life. And 3S Cloud Render Farm helps you render them faster than ever.