Blender’s powerful physics simulation tools allow 3D artists to create realistic cloth, fluid, and smoke effects with ease. Whether you’re designing dynamic character animations, lifelike environmental interactions, or cinematic visual effects, Blender provides a comprehensive set of physics-based tools to bring your scenes to life. In this blog post, we’ll explore how to set up and optimize cloth, fluid, and smoke simulations for stunning results.
Cloth Simulation in Blender
Cloth simulations are essential for creating realistic fabrics, from flowing garments to flags and curtains. Blender’s cloth physics engine allows users to define material properties, apply forces, and interact with objects in a realistic way. To get started, follow the steps below.
How to Set Up a Cloth Simulation
- Create a Mesh: Start by adding a plane or custom-shaped mesh for your cloth object.
- Enable Cloth Physics: Under the Physics Properties tab, select ‘Cloth’ to activate the simulation.
- Adjust Cloth Properties: Modify settings such as stiffness, damping, and collision to fine-tune realism.
- Add Collision Objects: Ensure surrounding objects, such as characters or furniture, have collision physics enabled.
- Bake the Simulation: Once satisfied with the motion, bake the simulation for a smooth playback.
Tips for Realistic Cloth Simulations
- Use higher resolution meshes for detailed folds and creases.
- Enable self-collision to prevent cloth from passing through itself.
- Adjust gravity and wind forces to add natural movement. Additionally, experiment with different fabric types for varied results.
>>> Read more: Blender and AI Render: The Future of Cloud Rendering
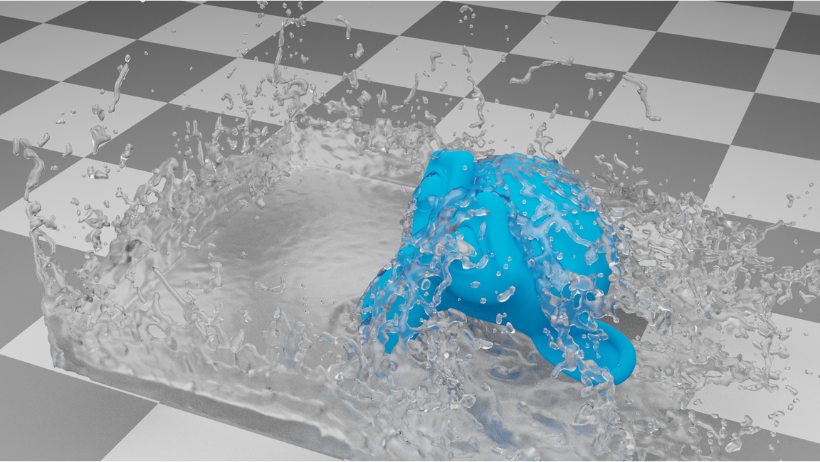
Fluid Simulation in Blender
Blender’s fluid simulation system enables the creation of lifelike water, lava, and other liquid effects. The Mantaflow engine provides advanced controls for realistic interactions and motion. To achieve high-quality fluid dynamics, follow these steps.
How to Set Up a Fluid Simulation
- Create a Domain: Add a cube and set it as a ‘Fluid’ domain under the Physics Properties.
- Add a Fluid Object: Assign a mesh as the fluid emitter (e.g., a sphere for a water droplet).
- Adjust Fluid Settings: Select the appropriate type (liquid or gas), define viscosity, and modify resolution.
- Bake the Simulation: Process the simulation to generate realistic motion and splashes.
- Refine with Surface Tension and Foam: Enable extra details for realism, ensuring a natural look.
Tips for High-Quality Fluid Effects
- Increase resolution divisions for smoother fluid motion.
- Use force fields (like wind or turbulence) to create natural interactions.
- Enable adaptive domain to optimize performance. Moreover, consider adjusting viscosity for different fluid types.
Smoke and Fire Simulation in Blender
Smoke and fire simulations add atmospheric realism to scenes. Blender’s Mantaflow system offers detailed smoke diffusion, turbulence, and realistic fire dynamics. If you want to create stunning effects, follow the steps below.
How to Set Up a Smoke Simulation
- Create a Domain: Add a cube and set it as a ‘Smoke’ domain in the Physics Properties.
- Add an Emitter: Assign a mesh (e.g., a plane or sphere) as the smoke source.
- Modify Smoke Settings: Choose between fire, smoke, or both.
- Adjust Density, Temperature, and Buoyancy: These settings define how smoke rises and spreads.
- Bake and Render: Finalize the simulation and render using Cycles or Eevee for high-quality results.
Tips for Realistic Smoke and Fire Effects
- Increase resolution divisions for detailed smoke trails.
- Use vorticity settings to enhance turbulence.
- Adjust light absorption in shading for better realism. Furthermore, play with density levels to achieve the perfect balance between visibility and realism.
Rendering Physics Simulations Faster with 3S Cloud Render Farm
High-resolution physics simulations can be computationally demanding, leading to long render times. 3S Cloud Render Farm offers a scalable solution, allowing Blender users to render complex cloth, fluid, and smoke simulations efficiently. By offloading rendering tasks to 3S Cloud, artists can focus on creativity while ensuring high-quality, photorealistic results in record time. Moreover, using cloud rendering significantly reduces hardware strain, making it a cost-effective choice.
>>> Read more: Understanding Render Engines in Blender: Eevee vs. Cycles
Conclusion
Blender’s physics simulations provide a robust toolkit for creating lifelike cloth, fluid, and smoke effects. By mastering these techniques and leveraging tools like 3S Cloud Render Farm, you can optimize both quality and efficiency in your 3D projects. Additionally, continual experimentation and practice will help refine your skills further.
🚀 Ready to take your Blender simulations to the next level? Start experimenting today and unlock the full potential of physics-based effects!